Install Mautic 5 using Composer, Configure NGINX, Run Mautic Installation Wizard, Connect Email Gateway (e.g. Amazon SES)
- Install the latest stable version of Mautic 5 and the desired Symfony mailer (in our example, we use Amazon SES) using Composer after recursively setting the permissions of /var/www/ to be owned by the web server user, www-data.
To avoid a timeout at the npm ci stage of the process (especially the webpack and modernizr stages), increase the npm timeout from the default of 300 seconds to 2000 seconds (defined in milliseconds).
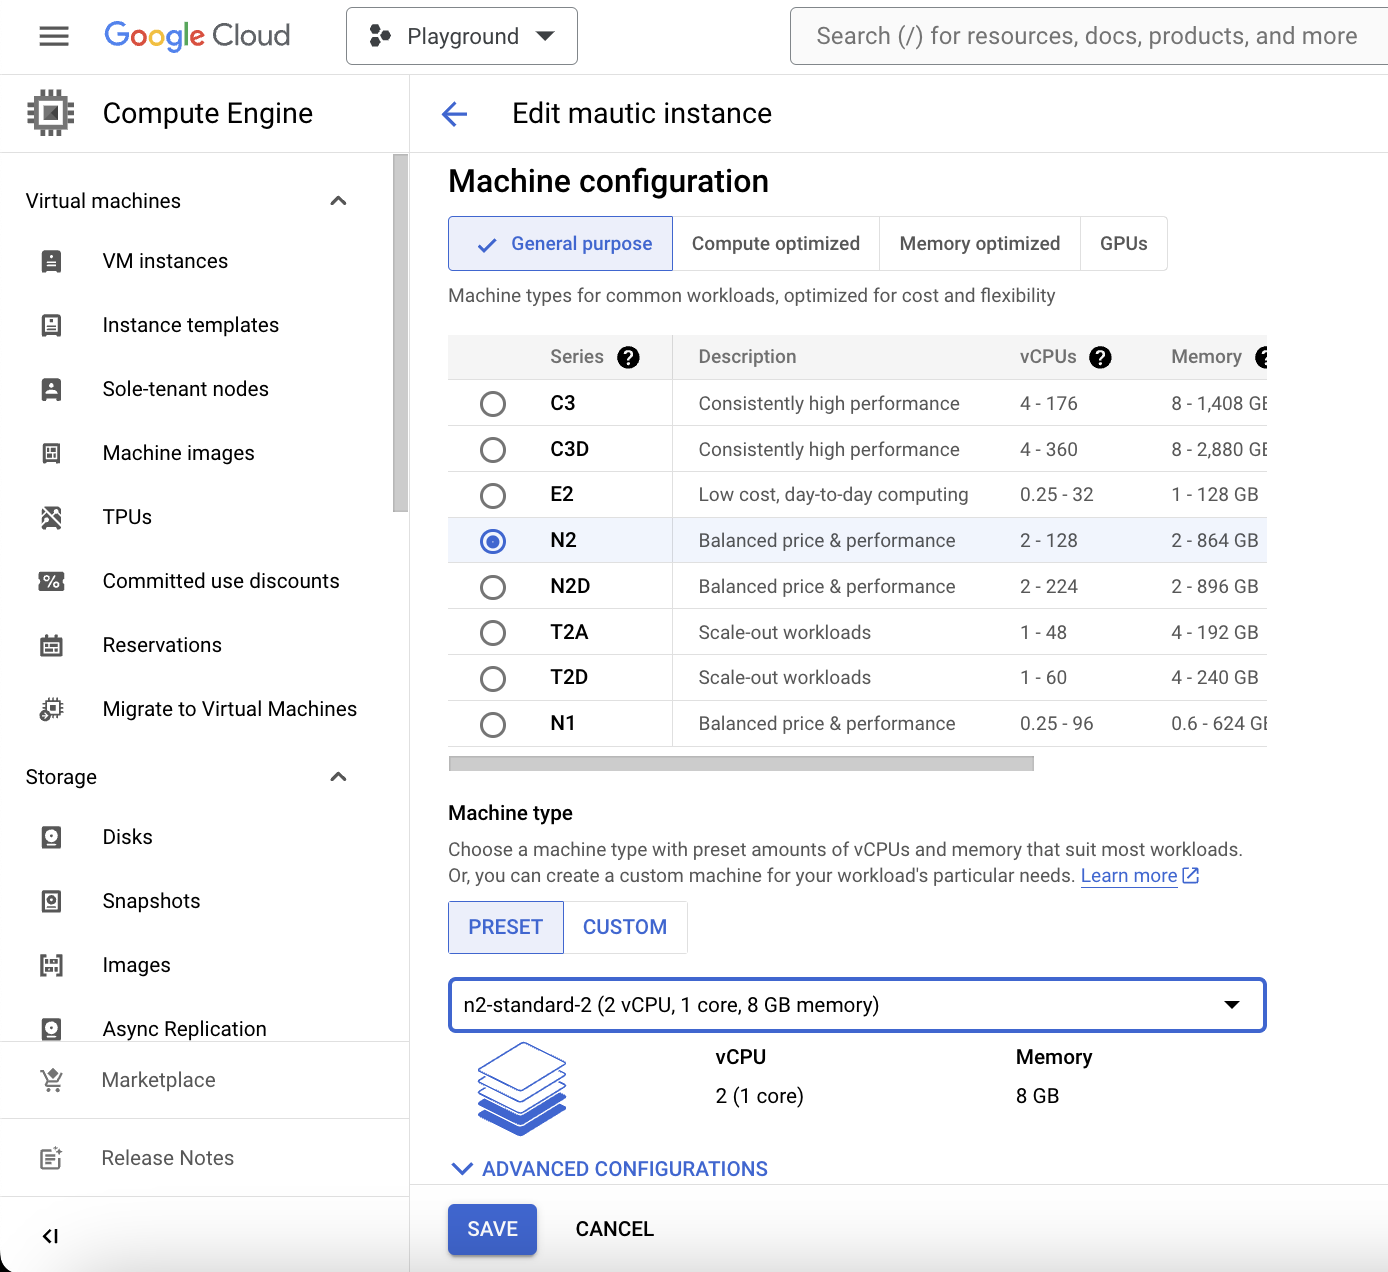
Also, it can be helpful to temporarily resize the cloud VM to an instance type with dedicated cores such as n2-standard-2 (2 vCPUs and 8 GB RAM), then scale back down after done running the Composer commands. You must first stop (shutdown, not delete) the instance from the Google Cloud Console before you can edit it to a different instance type.
~$ sudo chown -R www-data:www-data /var/www/

~$ npm config set fetch-timeout 2000000

~$ cd /var/www/html

~$ sudo -u www-data composer create-project mautic/recommended-project:^5 mautic --no-interaction
If the Mautic 5 install using Composer was successful, you should see an output with “Congratulations, you’ve installed the Mautic codebase.”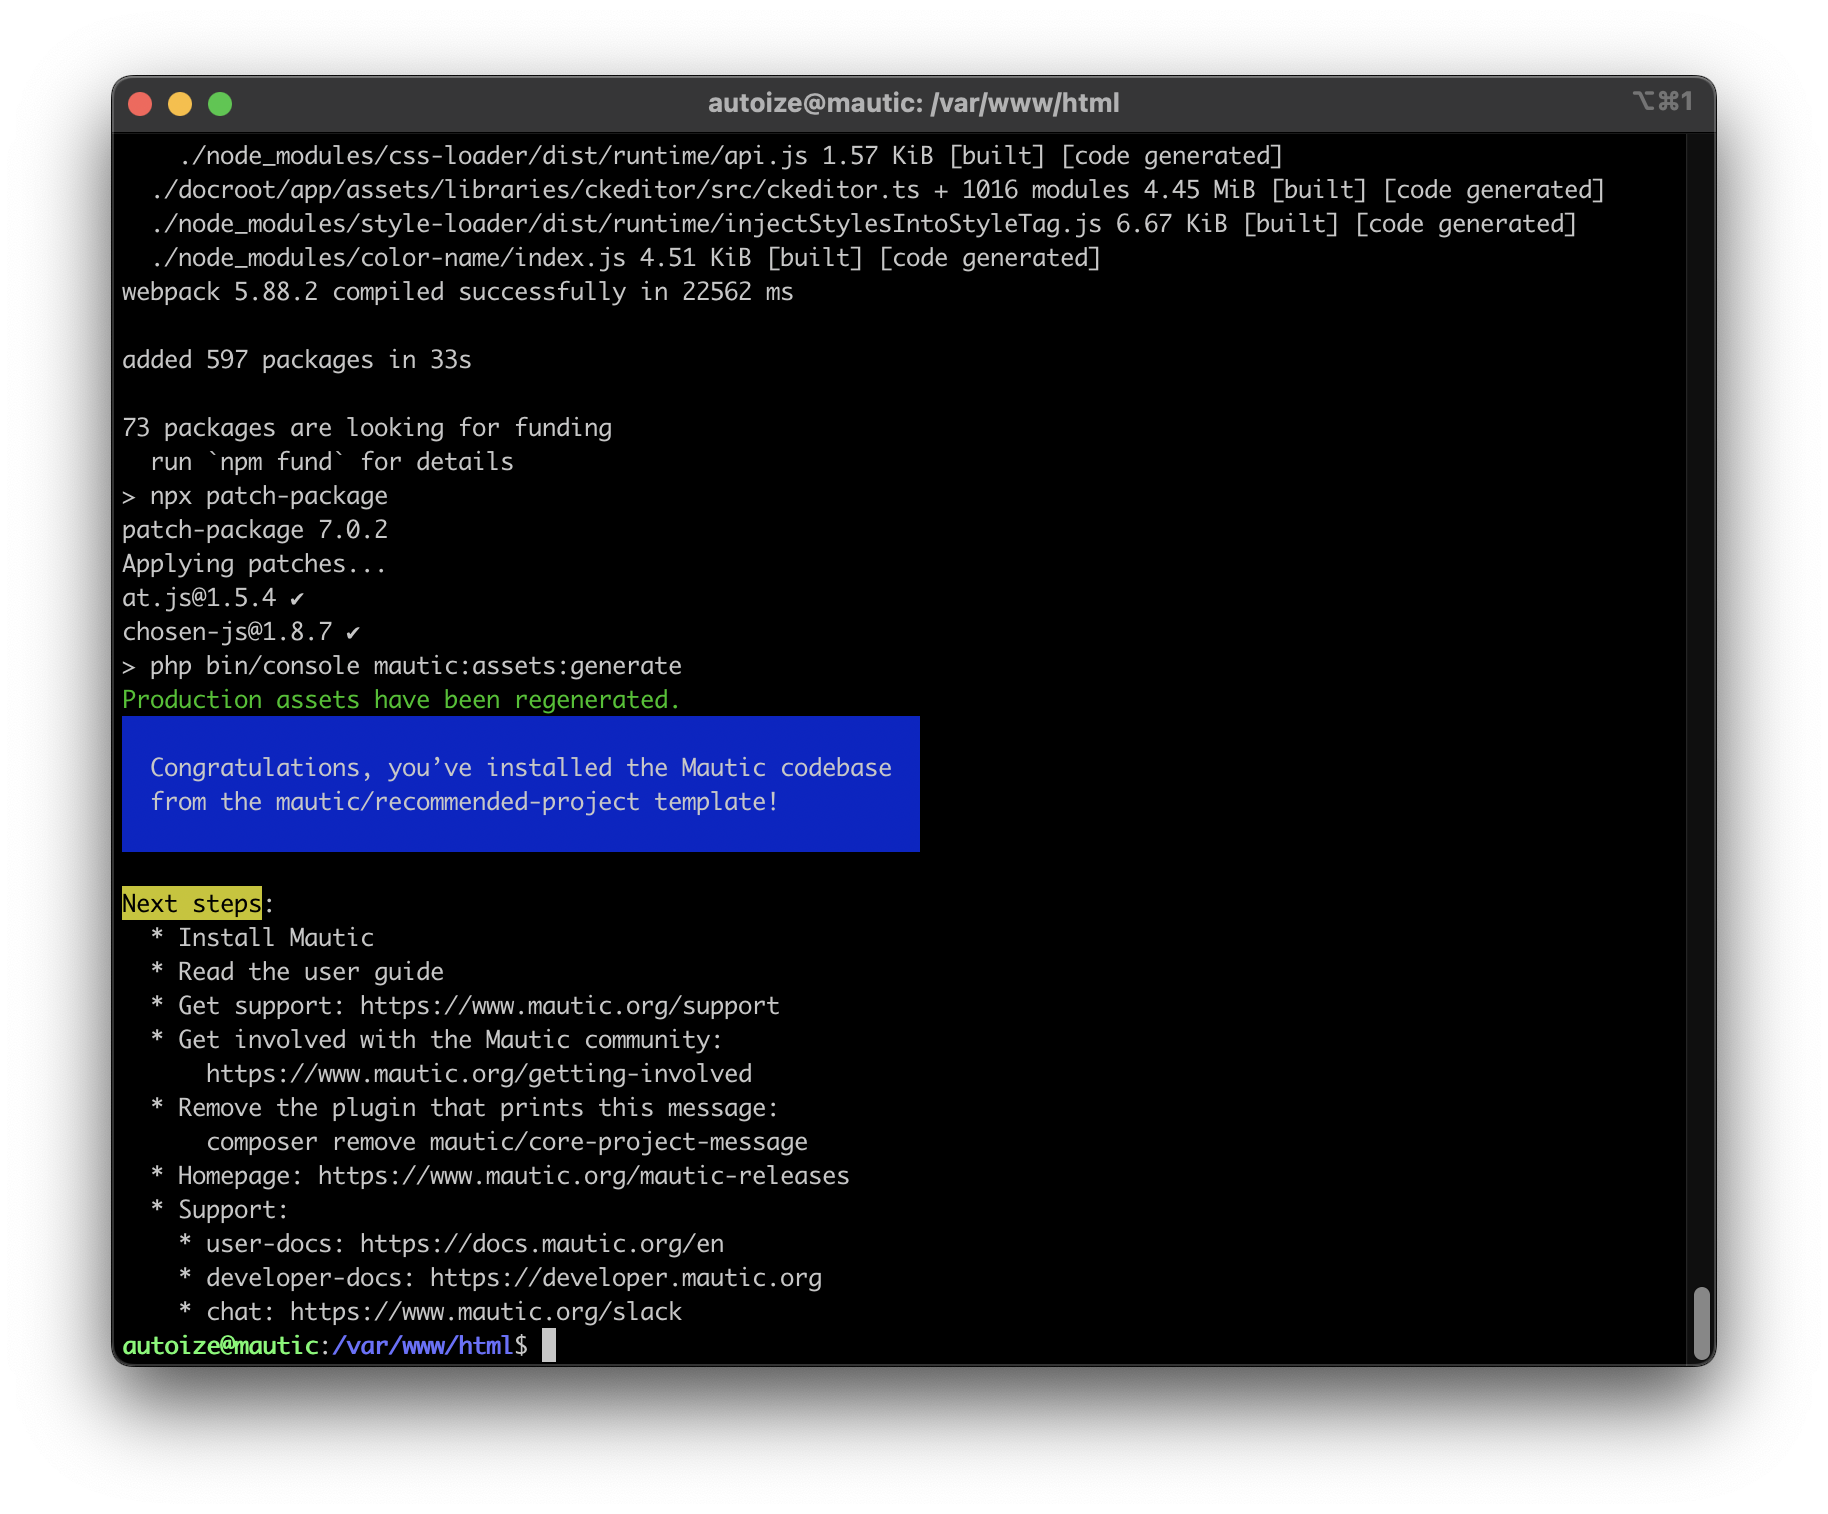
~$ cd /var/www/html/mautic

~$ sudo -u www-data composer require symfony/amazon-mailer
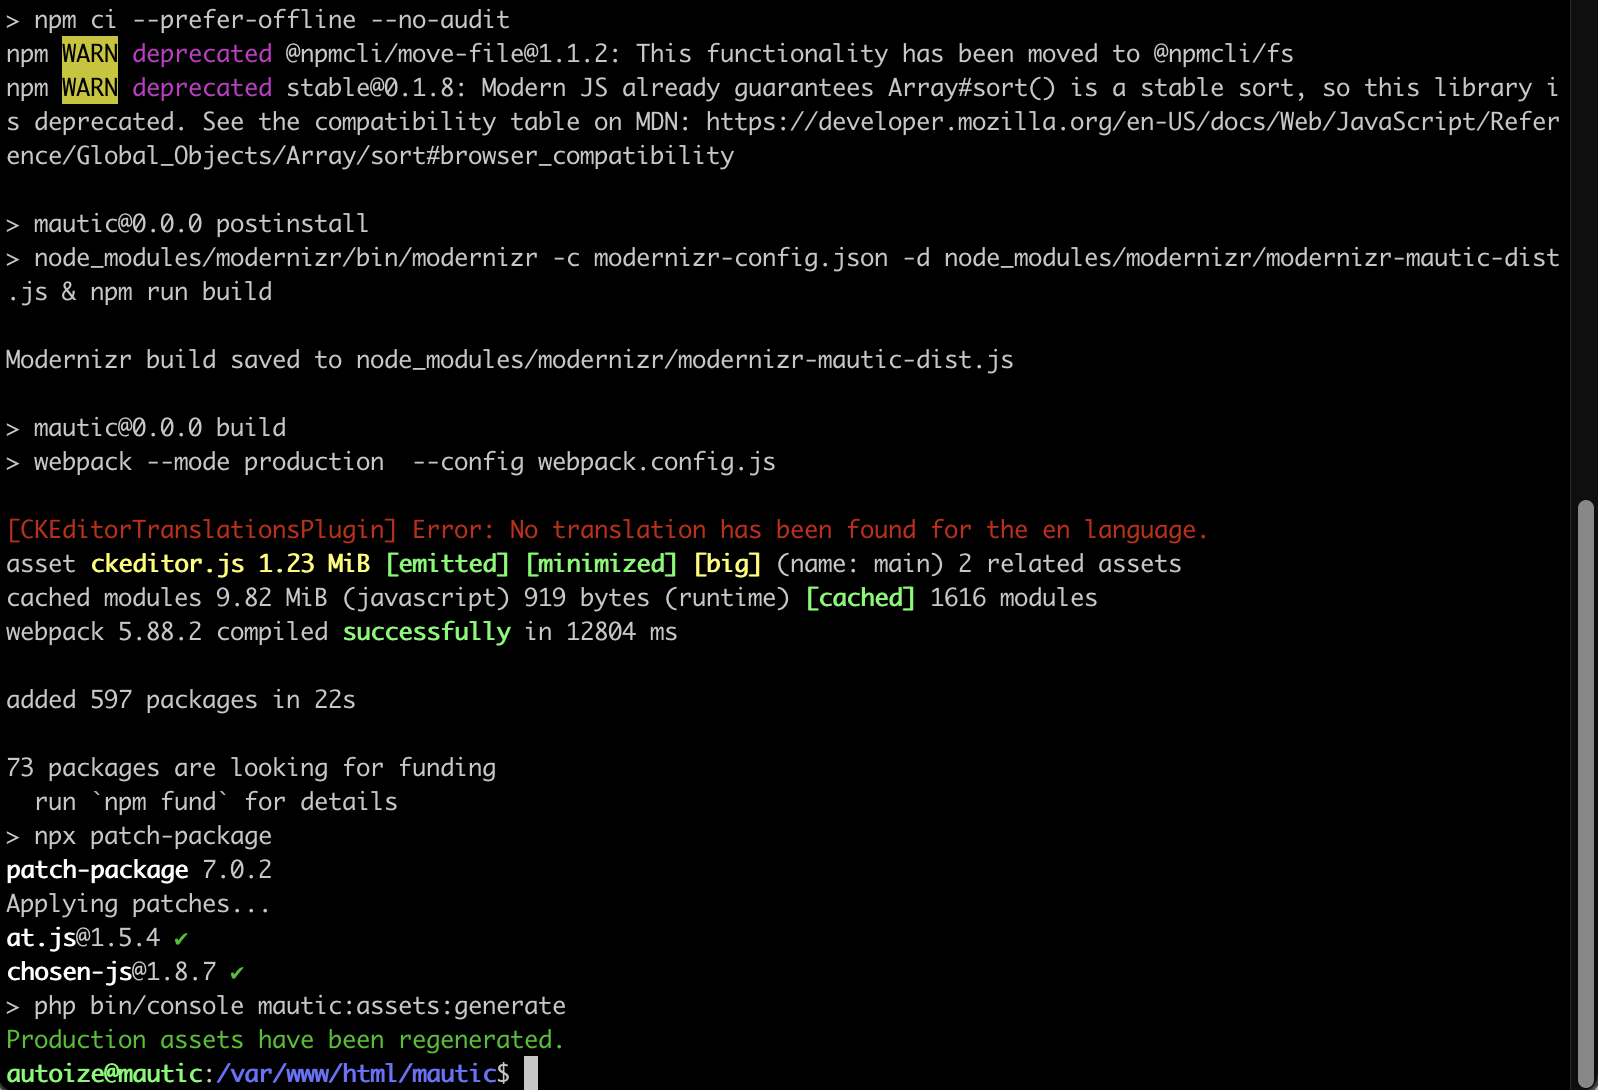
If the Symfony Amazon SES Mailer install using Composer was also successful, you should see an output with “Production assets have been regenerated.”
It is also important to clear and rewarm the Mautic cache from the command line to ensure that the newly installed Symfony Mailer is available from within the Mautic interface.
~$ sudo -u www-data php /var/www/html/mautic/bin/console cache:clear

~$ sudo -u www-data php /var/www/html/mautic/bin/console cache:warmup
![]()
- Disable the default NGINX configuration file, create and apply the NGINX config for Mautic, then reload the NGINX service.
~$ sudo rm -f /etc/nginx/sites-enabled/default

~$ sudo nano /etc/nginx/sites-available/mautic
server {

    listen 443 ssl;
    root /var/www/html/mautic/docroot;
    index  index.php index.html index.htm;
    server_name  <mauticurl.yourdomain.com>;
    ssl_certificate /etc/letsencrypt/live/<mauticurl.yourdomain.com>/fullchain.pem; # managed by Certbot
    ssl_certificate_key /etc/letsencrypt/live/<mauticurl.yourdomain.com>/privkey.pem; # managed by Certbot

        ssl_protocols TLSv1.2;
        ssl_prefer_server_ciphers on;
        # ssl_dhparam /etc/nginx/dhparam.pem;
        ssl_ciphers EECDH+AESGCM:EDH+AESGCM;
        ssl_ecdh_curve secp384r1;
        ssl_session_timeout  10m;
        ssl_session_cache shared:SSL:10m;
        ssl_stapling on;
        ssl_stapling_verify on;
        resolver 1.1.1.1;
        resolver_timeout 5s;
        add_header Strict-Transport-Security 'max-age=63072000; includeSubDomains; preload' always;
        ssl_session_tickets off;

    if ($scheme != "https") {
        return 301 https://$host$request_uri;
    }

    client_max_body_size 256M;

    add_header Access-Control-Allow-Headers 'Authorization,Content-Type,Accept,Origin,User-Agent,DNT,Cache-Control,X-Mx-ReqToken,Keep-Alive,X-Requested-With,If-Modified-Since';
    add_header Access-Control-Allow-Methods 'GET, POST, OPTIONS';

    access_log  /var/log/nginx/mautic_access.log;
    error_log   /var/log/nginx/mautic_error.log error;

    # Redirect all 404 errors to index
    error_page 404 /index.php;

    # Allow Certbot webroot challenge
    location ~ /.well-known {
     allow all;
    }

    # Rewrite all URLs without index.php
    rewrite ^/index.php/(.*) /$1  permanent;

    # Allow image files to be served
    location ~* \.(jpg|jpeg|png|ico|css)$ {
            allow all;
    }

    location / {
            try_files $uri /index.php$is_args$args;
    }

    location ~ \.php$ {
               include snippets/fastcgi-php.conf;
               fastcgi_pass unix:/var/run/php/php8.1-fpm.sock;
               fastcgi_param SCRIPT_FILENAME $document_root$fastcgi_script_name;
               include fastcgi_params;
    }

        ################################
        ##  START OF MAUTIC SETTINGS  ##

        # redirect some entire folders
        rewrite ^/(vendor|translations|build)/.* /index.php break;

        # Deny everything else in /app folder except folder bundles/Assets
        location ~ /app/bundles/.*/Assets/ {
            allow all;
            access_log off;
        }

        location ~ /app/ { deny all; }

        # Deny everything else in /addons or /plugins folder except Assets folder
        location ~ /(addons|plugins)/.*/Assets/ {
            allow all;
            access_log off;
        }

        # Add ^ to anchor regex
        location ~ ^/(addons|plugins)/ { deny all; }

        # Deny all .php files in themes folder
        location ~* ^/themes/(.*)\.php {
            deny all;
        }

        # Don't log favicon
        location = /favicon.ico {
            log_not_found off;
            access_log    off;
        }

        # Don't log robots
        location = /robots.txt  {
            access_log off;
            log_not_found off;
        }

        # Deny yaml, twig, markdown, ini file access
        location ~* /(.*)\.(?:markdown|md|twig|yaml|yml|ht|htaccess|ini)$ {
            deny all;
            access_log off;
            log_not_found off;
        }

        # Deny all attempts to access hidden files/folders such as .htaccess, .htpasswd, .DS_Store (Mac), etc...
        location ~ /\. {
            deny all;
            access_log off;
            log_not_found off;
        }

        # Deny all grunt, composer files
        location ~* (Gruntfile|package|composer)\.(js|json|jsonc)$ {
            deny all;
            access_log off;
            log_not_found off;
        }

        # Deny access to any files with a \.php extension in the uploads directory
        location ~* /(?:uploads|files)/.*\.php$ {
            deny all;
        }

        # Solve email tracking pixel not found
        location ~ email/(.*).gif {
            try_files $uri /index.php?$args;
        }

        location ~ mtracking.gif {
            add_header 'Access-Control-Allow-Origin' *;
            try_files $uri /index.php?$args;
        }

        # Solve js loading error: 404
        location ~ mtc.js {
            add_header 'Access-Control-Allow-Origin' *;
            try_files $uri /index.php?$args;
        }

        location ~* ^/media/js/$ {
            add_header 'Cache-Control' public;
            expires 7d;
        } #this should fall through
        location ~ (.*).js {
            try_files $uri /index.php?$args;
        }

        # Set cache expiry time
        location ~* \.(jpg|jpeg|png|ico|css)$ {
            expires 365d;
        }

        location ~* \.(pdf)$ {
            expires 30d;
        }

        ## END OF MAUTIC SETTINGS ##
        ############################

}

server {

    if ($host = <mauticurl.yourdomain.com>) {
        return 301 https://$host$request_uri;
    }

        listen 80 ;
        listen [::]:80 ;
        server_name <mauticurl.yourdomain.com>;
        return 404 ;

    location ~ /\.well-known {
        allow all;
    }

}
~$ sudo ln -s /etc/nginx/sites-available/mautic /etc/nginx/sites-enabled/mautic
~$ service nginx reload
- After the Mautic project has been created and built with Composer, navigate to your Mautic URL in the browser to complete the Mautic installation wizard.
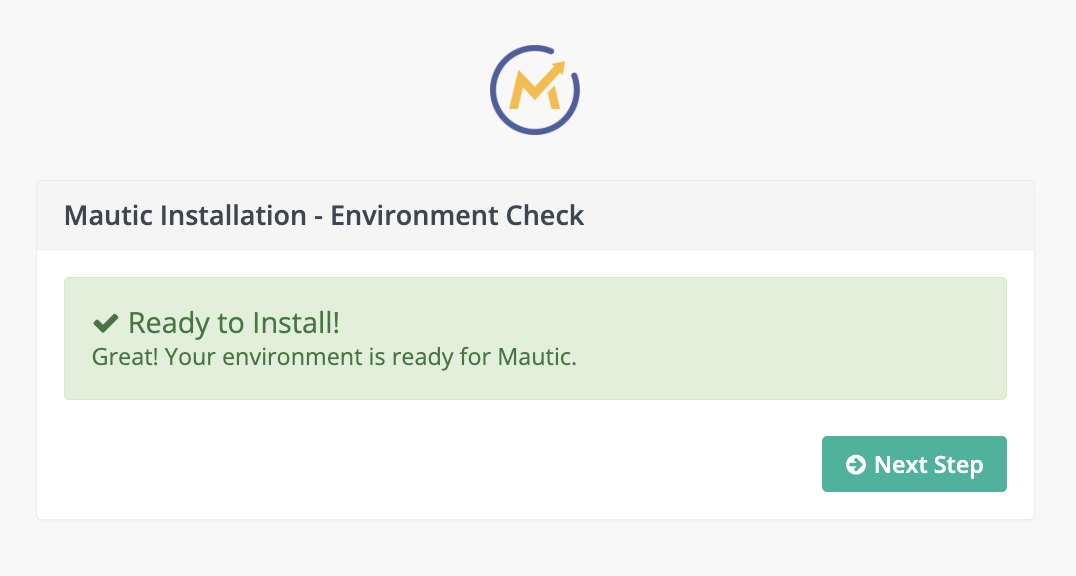
As we have properly installed the necessary PHP modules and set the values in the PHP configuration, Mautic will display a message stating “Great! Your environment is ready for Mautic.”
At the step where the database is initialized, you will require the DB name, user, and password that you specified in section II, step 12.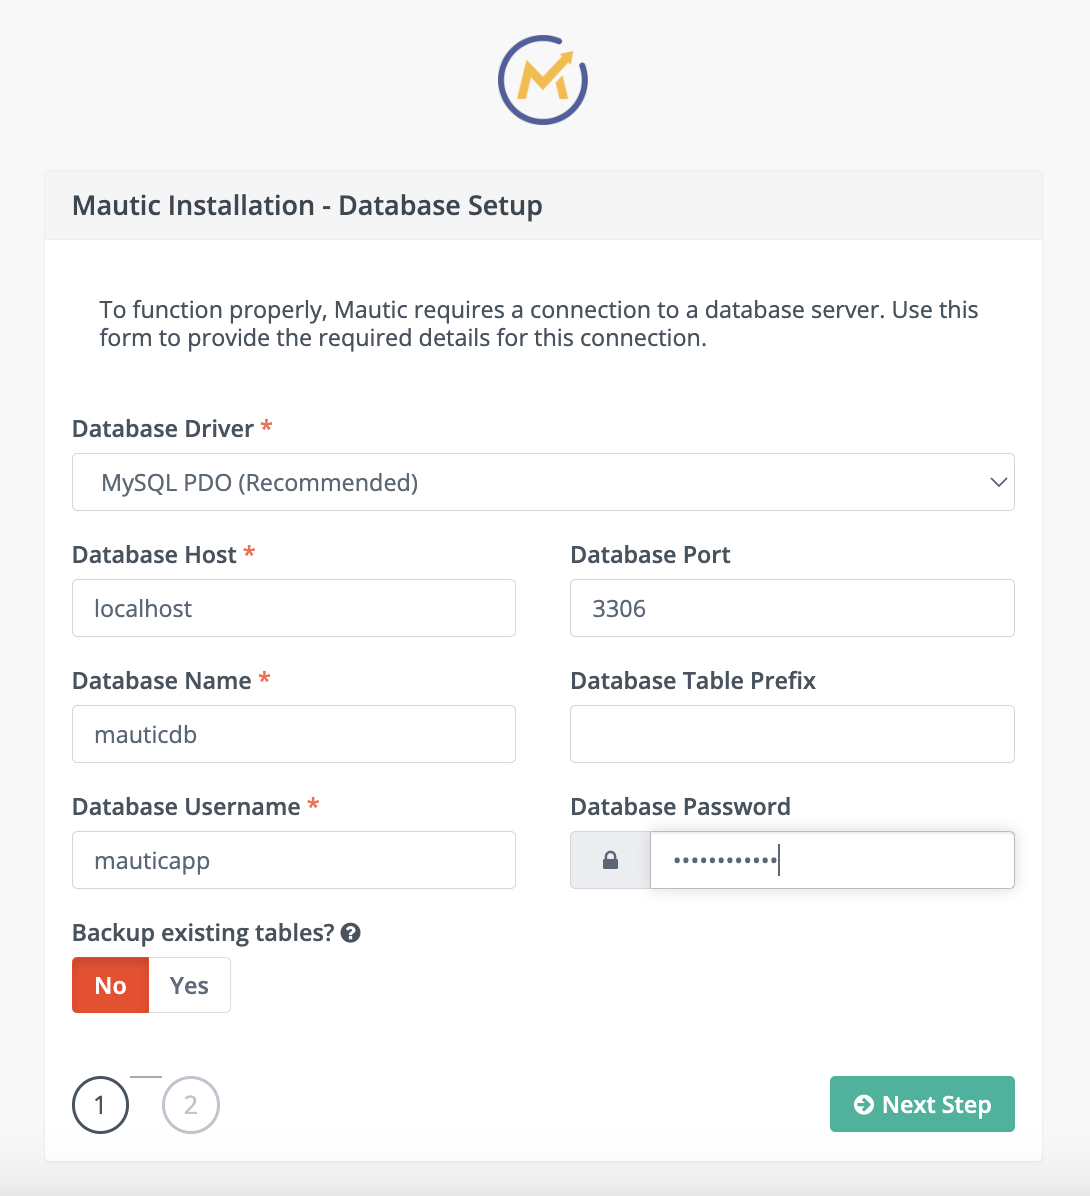
Also, you will create the first administrative user for Mautic which you will use from now on to access the Mautic dashboard.
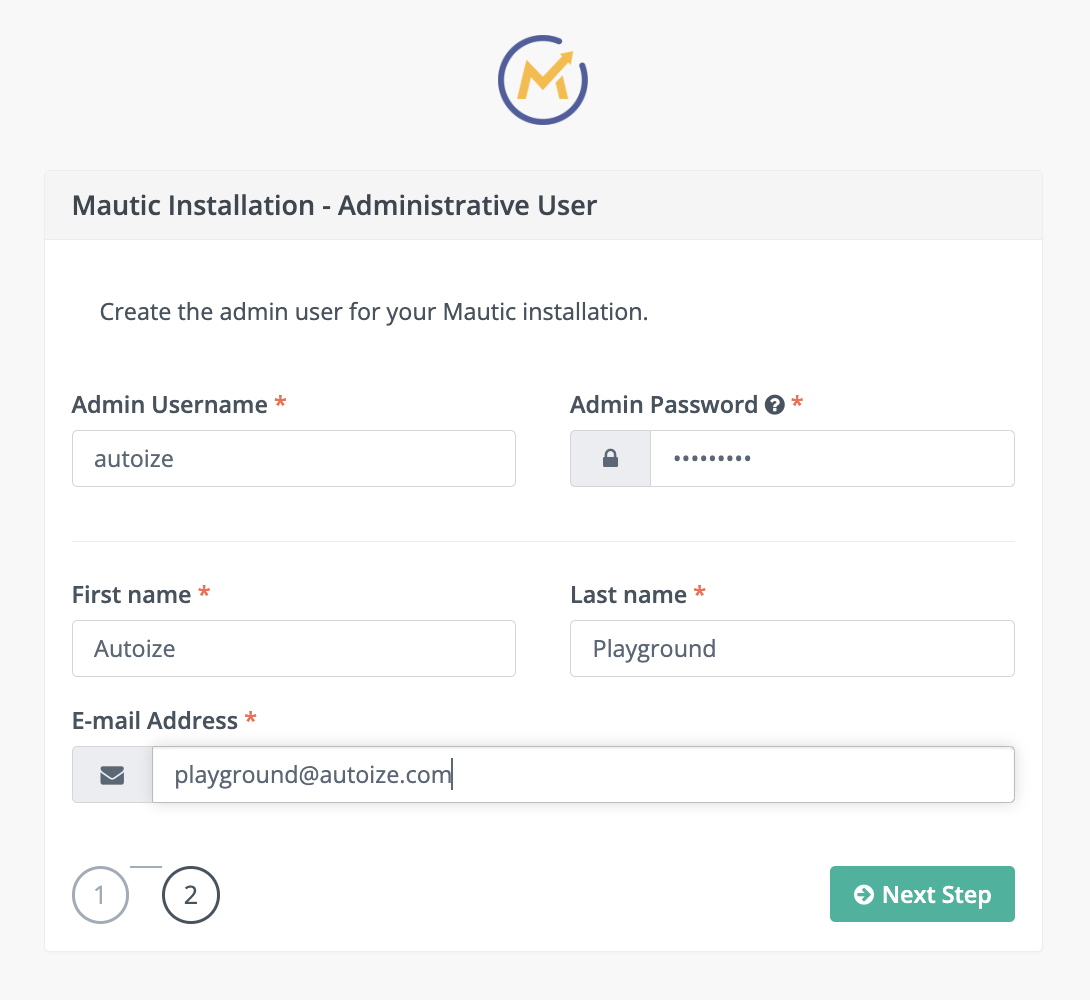
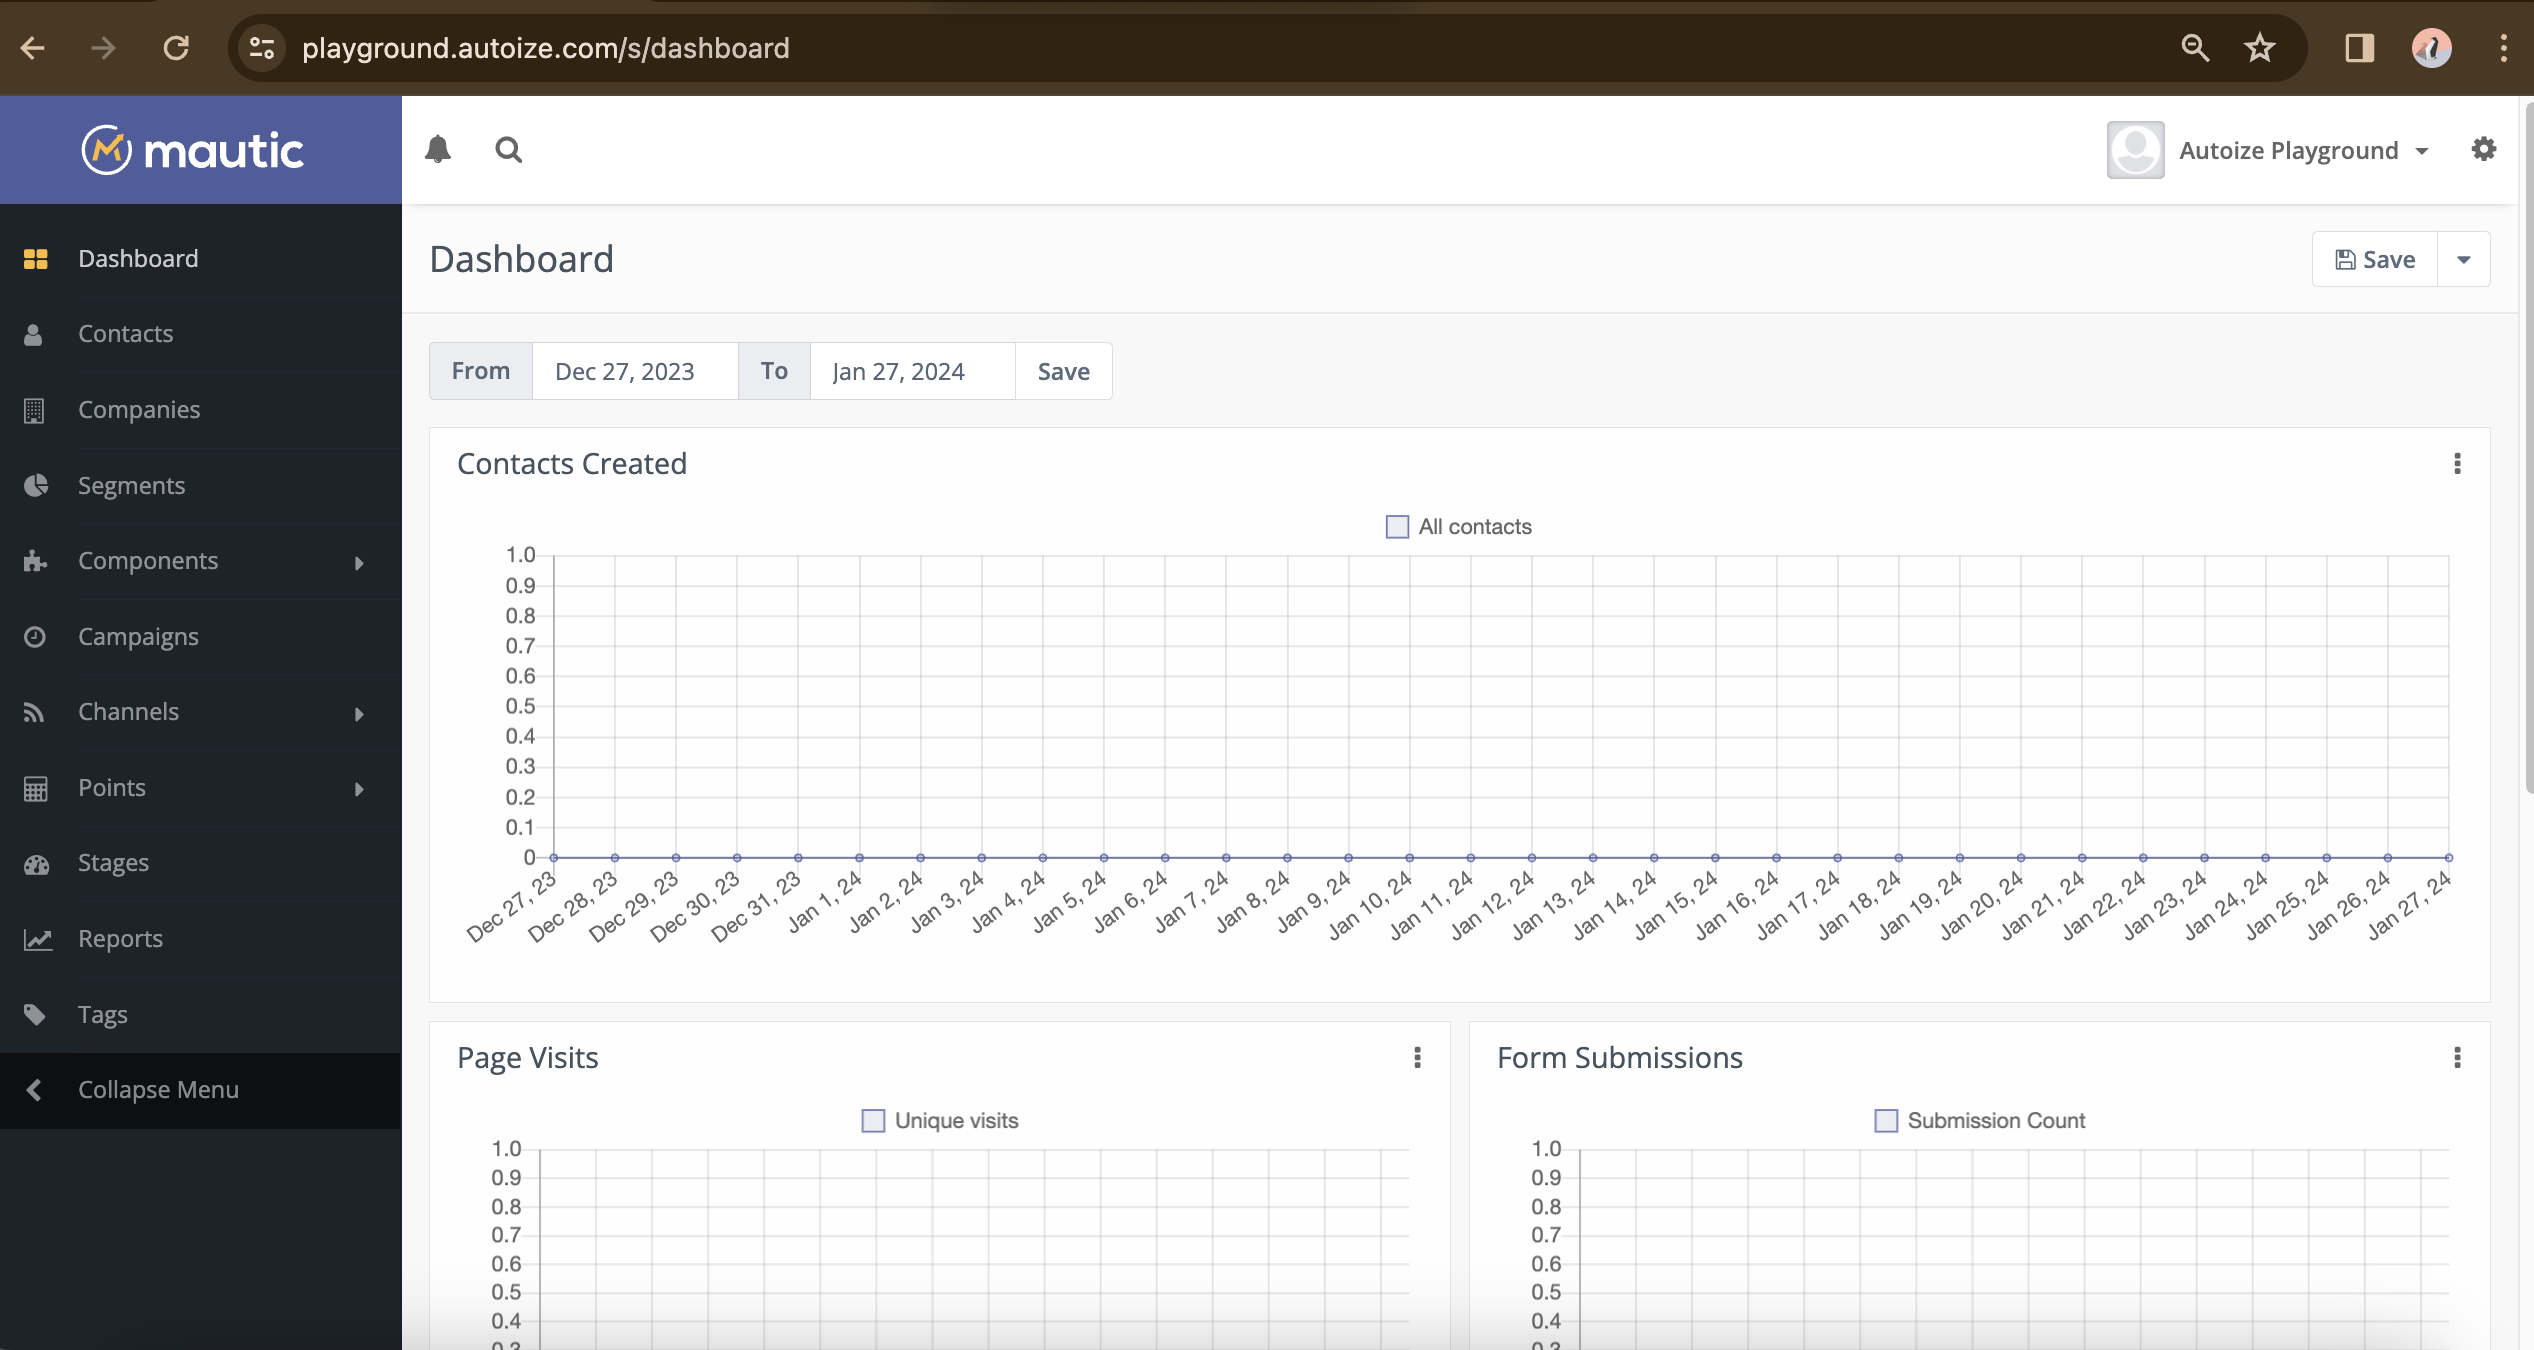
Once Mautic 5 has been completely installed, you will be redirected to the login screen where you can use the administrative username and password that you just created to sign in. Following the initial sign in, the Mautic 5 dashboard will look like below:
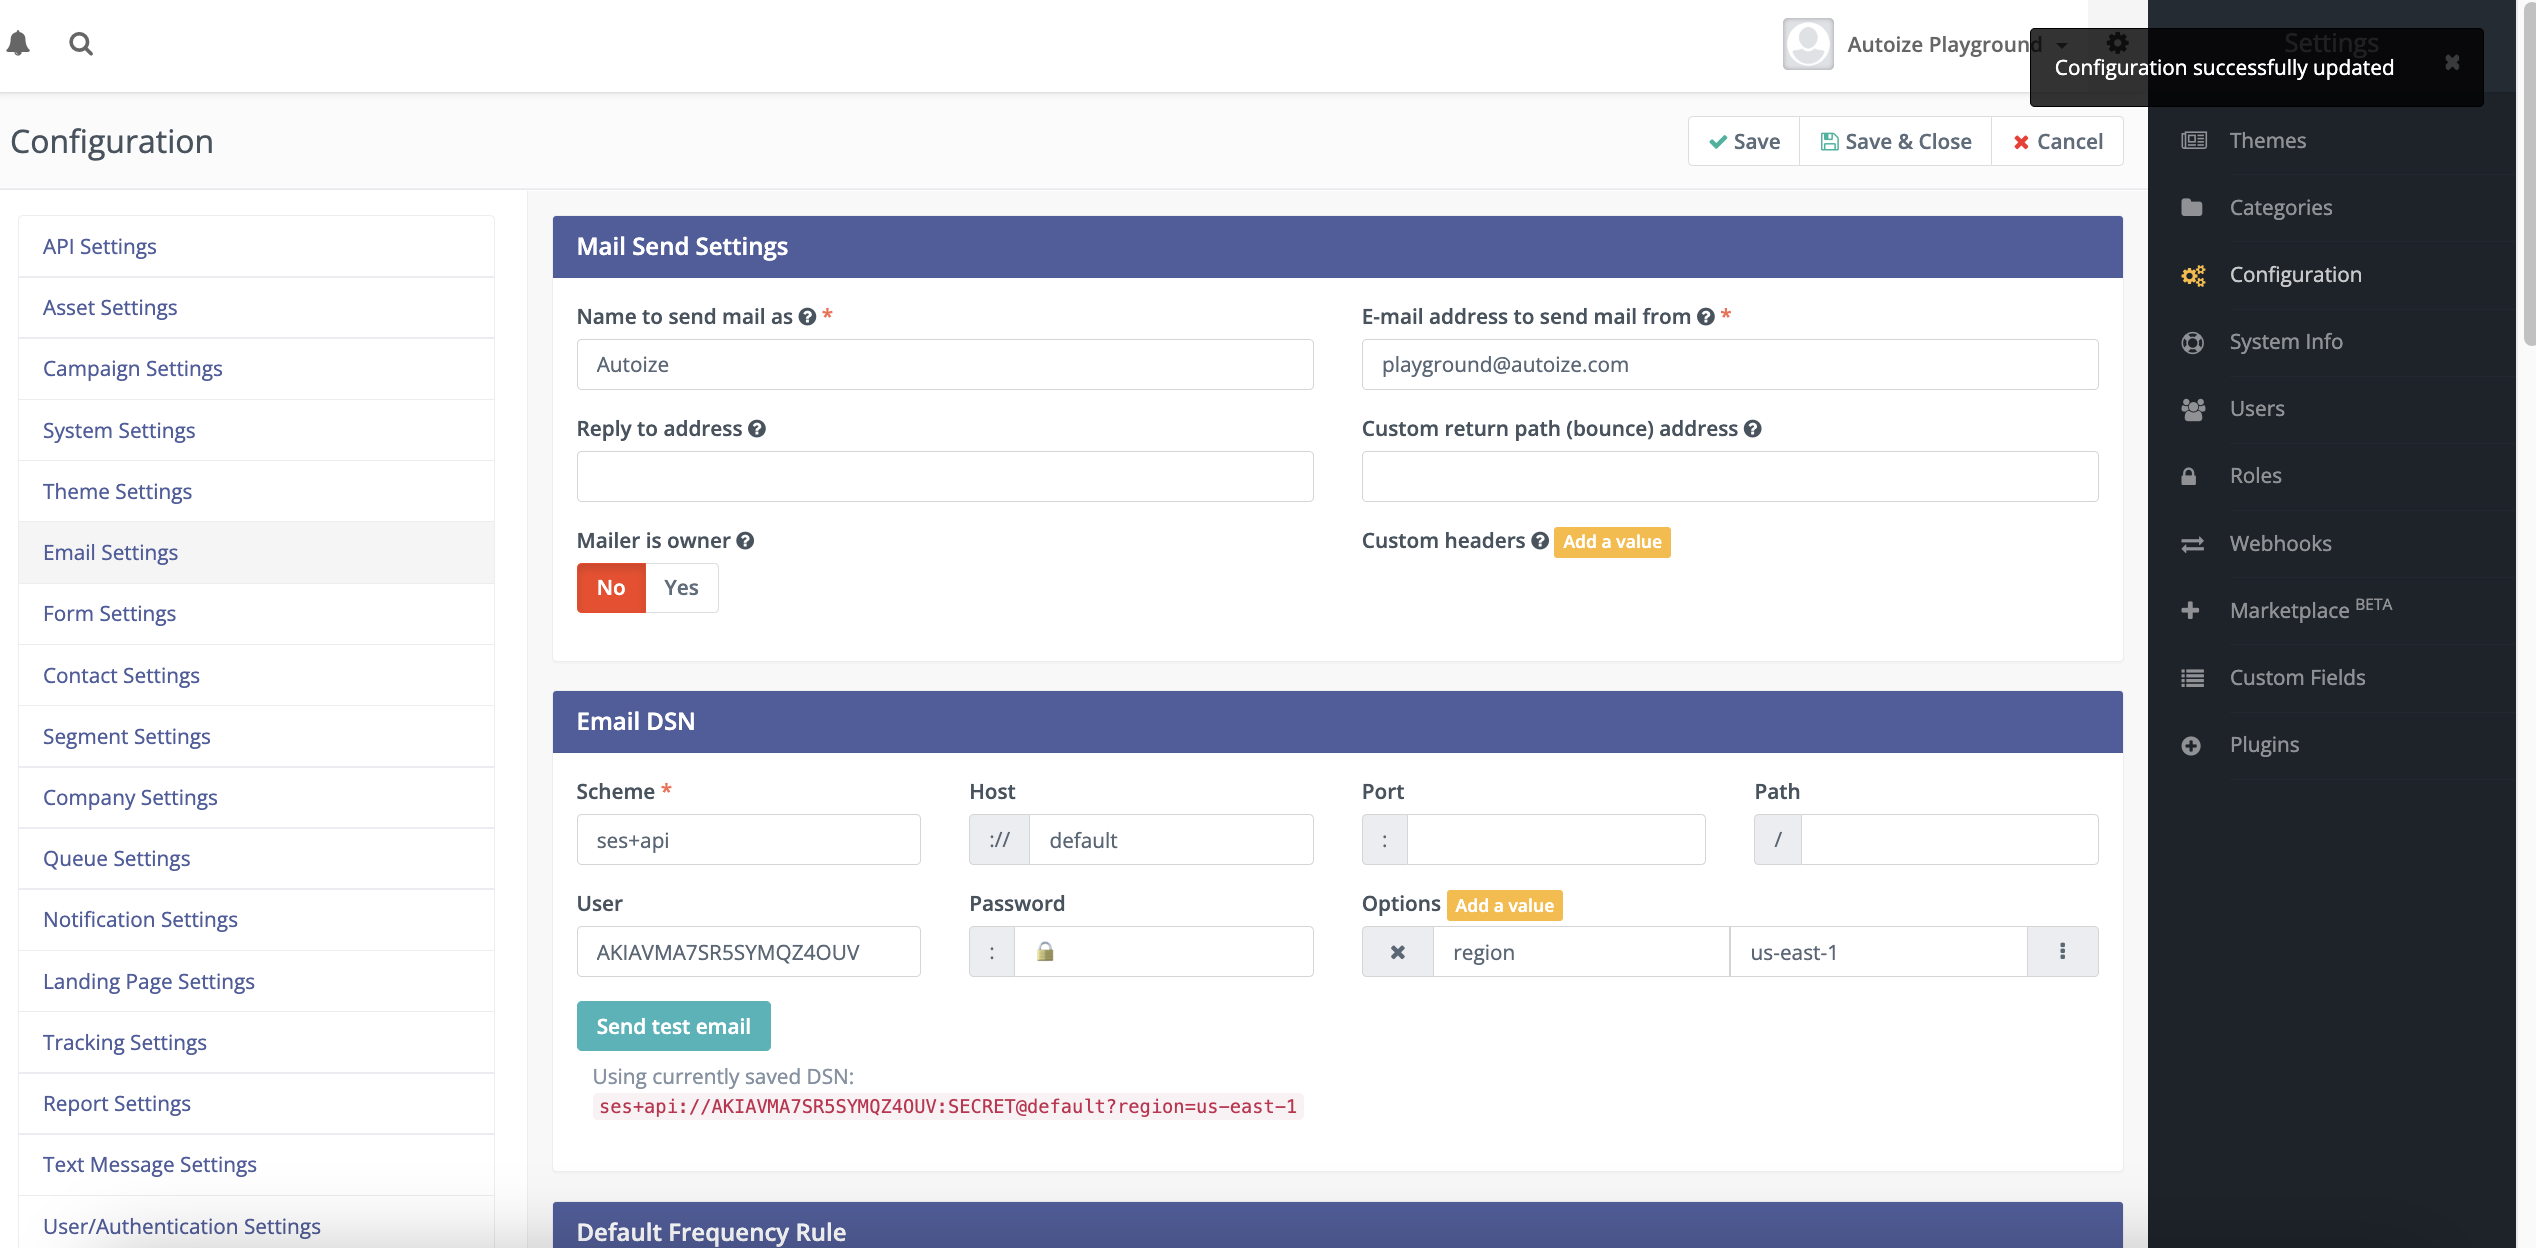
- One of the changes in Mautic 5 compared to previous versions of Mautic is that the email sending (gateway) credentials are configured after the initial installation wizard in Configuration > Email Settings. The Configuration options are accessed by clicking the “gear” icon in the top right corner of the page.
Before proceeding, you should change the email sender name and address in the fields labelled “Name to send mail as” and “E-mail address to send mail from”. The email address must correspond to a domain which you have successfully verified with your email gateway provider, such as by adding the verification DNS records required by Amazon SES.
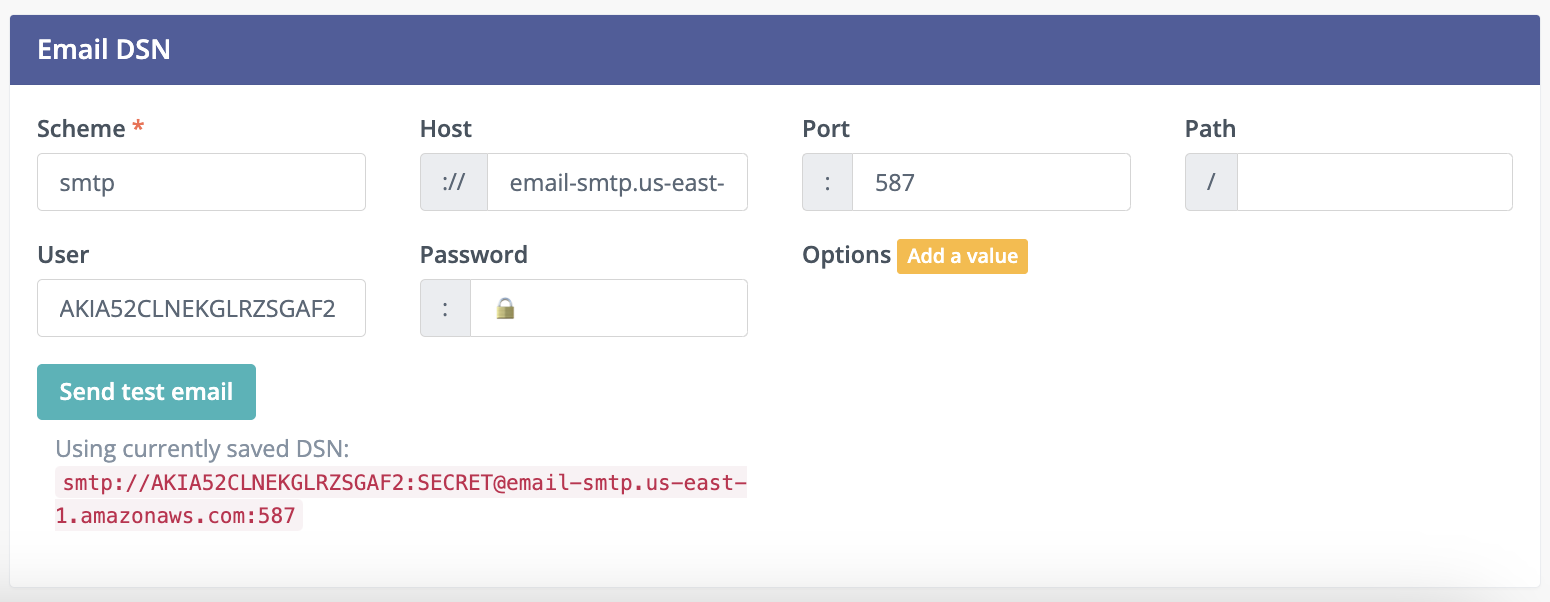
In Mautic 5 and above, the email credentials are defined in Data Source Name (DSN) format. In the screenshots below, you will see two different example configurations.
-
- Amazon SES API using the Symfony Amazon SES Mailer
- Amazon SES SMTP using the default Mailer in the Mautic Core
In case you receive the error “The “ses+api” scheme is not supported.” error when attempting to set the AWS API key, use the cache:clear and cache:warmup commands described previously in section III, step 1 to ensure that the Mautic cache has been refreshed.
- To ensure that Mautic can run its automation tasks in the background, the cron (scheduled tasks) daemon must be running in Linux. A list of cron jobs are required by Mautic for tasks such as updating segments (add & remove contacts based on filters), rebuilding campaigns (set actions as pending for qualifying contacts), and triggering campaigns (executing actions such as “send email”).
From your local machine, reconnect to the Mautic VM using SSH to access the Ubuntu command line. Then, install & enable the cron daemon, and add the cron jobs to the system-wide crontab, /etc/crontab. It is also a good opportunity add the certbot renew command to ensure the Let’s Encrypt SSL certificate is renewed when it approaches its expiration date, every 90 days.
~$ sudo apt install cron -y

~$ sudo systemctl enable cron

~$ sudo systemctl start cron
It is crucial to make sure that the Let’s Encrypt renew cron job runs as root, while Mautic’s cron jobs run as the web server user, www-data.
~$ sudo nano /etc/crontab
0 3 * * * root certbot renew > /dev/null 2>&1
*/2 * * * * www-data php /var/www/html/mautic/bin/console mautic:segments:update >/dev/null 2>&1
*/2 * * * * www-data php /var/www/html/mautic/bin/console mautic:campaigns:rebuild >/dev/null 2>&1
*/2 * * * * www-data php /var/www/html/mautic/bin/console mautic:campaigns:trigger >/dev/null 2>&1
*/15 * * * * www-data php /var/www/html/mautic/bin/console mautic:email:fetch >/dev/null 2>&1
*/2 * * * * www-data php /var/www/html/mautic/bin/console mautic:messages:send >/dev/null 2>&1
*/15 * * * * www-data php /var/www/html/mautic/bin/console mautic:social:monitoring >/dev/null 2>&1
*/15 * * * * www-data php /var/www/html/mautic/bin/console mautic:webhooks:process >/dev/null 2>&1
*/2 * * * * www-data php /var/www/html/mautic/bin/console mautic:broadcasts:send >/dev/null 2>&1
*/5 * * * * www-data php /var/www/html/mautic/bin/console mautic:import >/dev/null 2>&1