Installing Web Server (NGINX), Certbot, PHP, Node.js/NPM/Composer, Database (MySQL)
In the previous section, you prepared a Google Cloud VM of an appropriate size & OS for installing Mautic 5, assigned it a reserved (non-changing) static IP, and authorized your local machine’s SSH key to access it.
- Now, from your local machine, open a Powershell/Windows Terminal (for Windows 10/11) or Terminal (for MacOS). Use the following SSH command to connect to the Linux command line of the VM you created.
~$ ssh <username>@<external ip address>
The username in our example above would be “autoize” and the external IP address would be “34.23.33.29” so our command would look like this.
~$ ssh autoize@34.23.33.29
On the first time connecting, you will be prompted whether to trust the server’s fingerprint. Type “yes” and press enter to continue. Once you successfully connect to the VM, the prompt will change to <username>@<hostname> of the remote Ubuntu machine.
autoize@mautic ~$
- First, update the apt repository information and ensure the system packages are up to date.
~$ sudo apt update && sudo apt upgrade -y
- Install the nginx web server package.
~$ sudo apt install nginx -y
- Enable nginx at start up and start the nginx service.
~$ sudo systemctl enable nginx

~$ sudo systemctl start nginx
- Install certbot and create the symbolic link in your PATH so that the certbot command can be invoked from the shell.
~$ sudo snap install --classic certbot

~$ sudo ln -s /snap/bin/certbot /usr/bin/certbot
- Obtain an SSL certificate by calling the certbot command. Specify an admin email address to receive certificate expiry notifications, and accept the Let’s Encrypt TOS.
~$ sudo certbot --nginx -d <mauticurl.yourdomain.com> -m <youremail@yourdomain.com> --agree-tos
As an example, here is how our command looks like after we substitute in the required values.
~$ sudo certbot --nginx -d playground.autoize.com -m info@autoize.com --agree-tos
- Add the PPA for PHP and update the apt repositories again.
~$ sudo apt install software-properties-common -y

~$ sudo add-apt-repository ppa:ondrej/php

~$ sudo apt update
- Install PHP-FPM and the required modules for Mautic. Enable and start the PHP-FPM service, so that it can listen for requests proxied to it from the NGINX web server.
~$ sudo apt install php8.1 php8.1-{xml,mysql,imap,zip,intl,curl,gd,mbstring,bcmath,fpm} -y

~$ sudo systemctl enable php8.1-fpm

~$ sudo systemctl start php8.1-fpm
- Install your preferred text editor, then modify the following php.ini values to increase the memory limit & timeouts for Mautic 5, allow large file uploads (images, assets, themes) > 2M, and set the timezone to UTC.
~$ sudo apt install nano -y

~$ sudo nano /etc/php/8.1/fpm/php.ini

memory_limit = 512M
upload_max_filesize = 256M
post_max_size = 256M
max_execution_time = 3600
date.timezone = UTC

~$ sudo systemctl restart php8.1-fpm
- Modify (or add) the following PHP-FPM values in www.conf. Depending on your distribution, some of the values may already be set correctly. In that case, there is no need to change them.
~$ sudo nano /etc/php/8.1/fpm/pool.d/www.conf

listen = /run/php/php8.1-fpm.sock
listen.owner = www-data
listen.group = www-data

~$ sudo systemctl restart php8.1-fpm
- Install Node.js, the Node Package Manager (NPM), and Composer. NPM should be installed using Aptitude instead of apt to avoid an issue with “unmet dependencies” and holding “broken packages”.
~$ curl -fsSL https://deb.nodesource.com/setup_20.x | sudo -E bash -

~$ sudo apt install nodejs -y

~$ sudo apt install aptitude -y

~$ sudo aptitude install npm -y

~$ sudo apt install composer -y
- Install MySQL 8.0 from the official MySQL community repositories. First, add the repository maintained by Oracle, update the apt repository information, then proceed with the MySQL Community Edition install. Finally, enable the MySQL service at start-up and start the MySQL server.
~$ cd ~

~$ curl -L https://dev.mysql.com/get/mysql-apt-config_0.8.29-1_all.deb -O

~$ sudo apt install dialog

~$ sudo dpkg -i mysql-apt-config_0.8.29-1_all.deb
For the default version (MySQL 8.0), select “Ok” using the arrow keys on your keyboard and press enter to continue and accept the defaults when prompted to configure the repository. 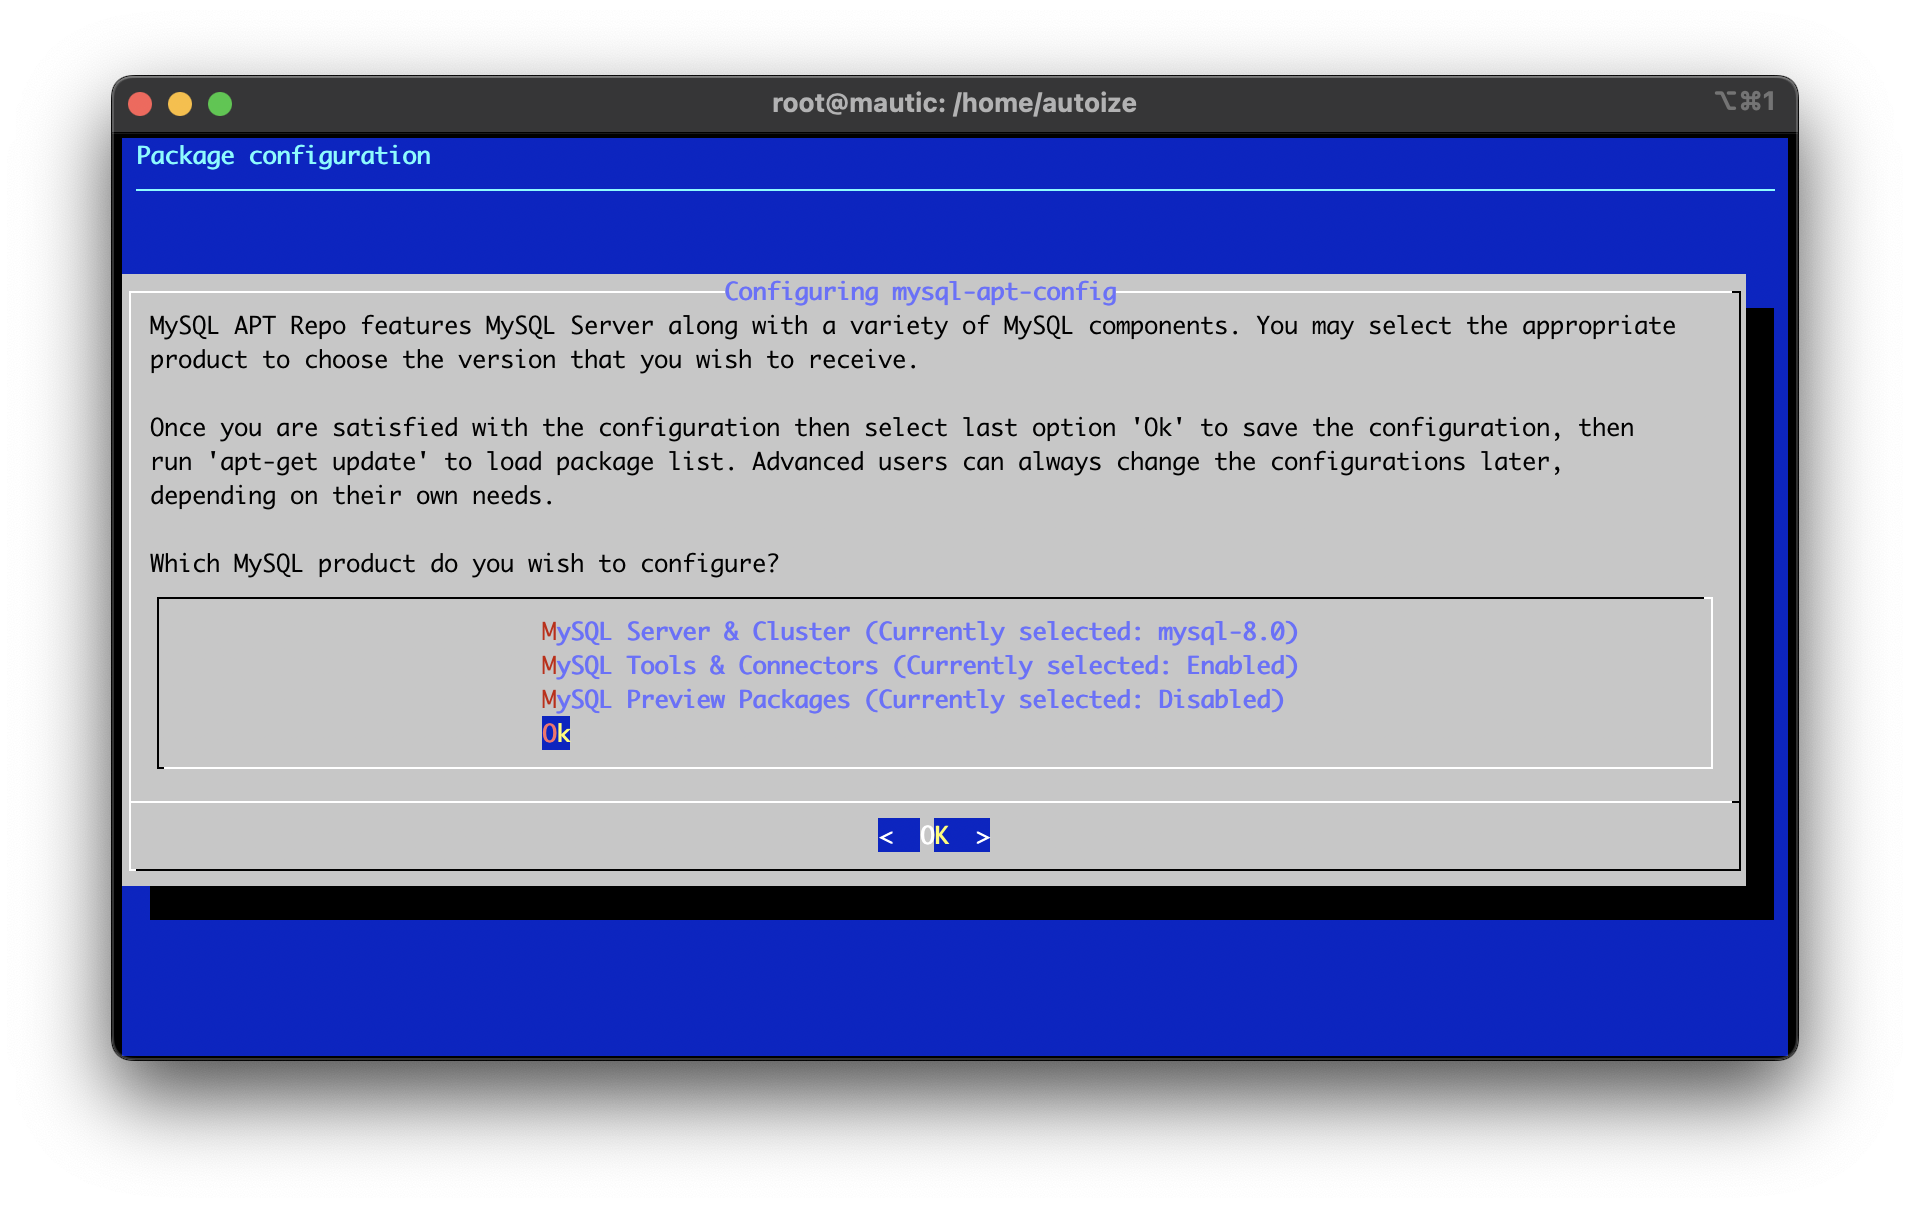
~$ sudo apt update

~$ sudo apt install mysql-server
When prompted, set a root password for the MySQL server, repeat the password to verify that you have typed it correctly.
Then, choose “Use Legacy Authentication Method (Retain MySQL 5.x Compatibility)” when the options are presented to you.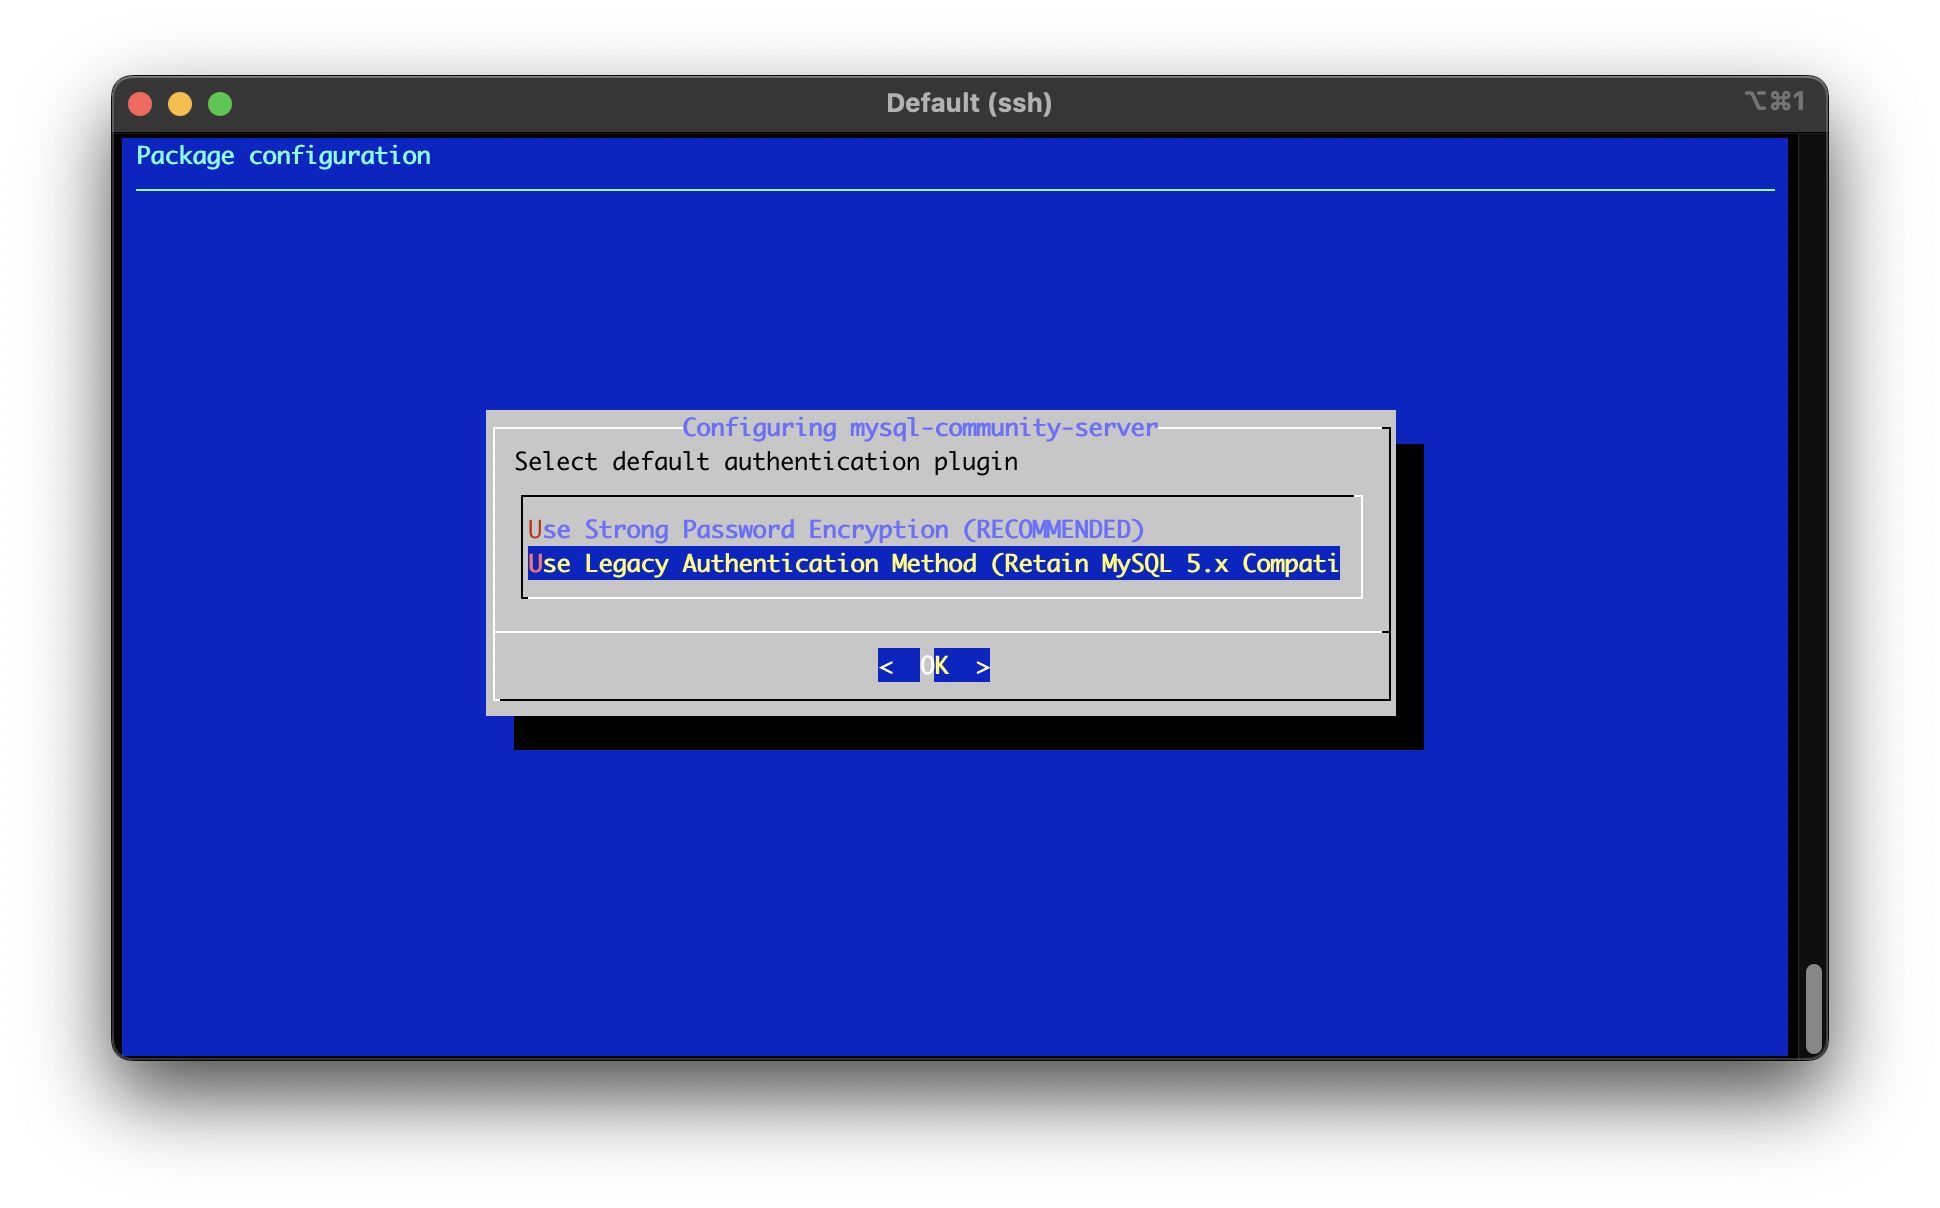
~$ sudo systemctl enable mysql

~$ sudo systemctl start mysql
- Using the root password defined for MySQL during MySQL server installation, complete the mysql_secure_installation to delete the anonymous users, disable remote root access, and flush the privilege table.
~$ mysql_secure_installation
Securing the MySQL server deployment.

Enter password for user root:

VALIDATE PASSWORD COMPONENT can be used to test passwords
and improve security. It checks the strength of password
and allows the users to set only those passwords which are
secure enough. Would you like to setup VALIDATE PASSWORD component?

Press y|Y for Yes, any other key for No: No

Using existing password for root.

Change the password for root ? ((Press y|Y for Yes, any other key for No) : No

 ... skipping.

By default, a MySQL installation has an anonymous user,
allowing anyone to log into MySQL without having to have
a user account created for them. This is intended only for
testing, and to make the installation go a bit smoother.
You should remove them before moving into a production
environment.

Remove anonymous users? (Press y|Y for Yes, any other key for No) : Y

Success.

Normally, root should only be allowed to connect from
'localhost'. This ensures that someone cannot guess at
the root password from the network.

Disallow root login remotely? (Press y|Y for Yes, any other key for No) : Y

Success.

By default, MySQL comes with a database named 'test' that
anyone can access. This is also intended only for testing,
and should be removed before moving into a production
environment.

Remove test database and access to it? (Press y|Y for Yes, any other key for No) : Y

 - Dropping test database...

Success.

 - Removing privileges on test database...

Success.

Reloading the privilege tables will ensure that all changes
made so far will take effect immediately.
Reload privilege tables now? (Press y|Y for Yes, any other key for No) : Y

Success.

All done!
- Authenticate as the root MySQL user, and create the Mautic database, user, and privilege grants in the MySQL console. The MySQL root password is the one which you defined when installing MySQL.
You should generate a random password for the MySQL user that is different from the MySQL root password. A command you can use at the Linux terminal to generate a password is: ~$ openssl rand -base64 16
~$ mysql -uroot -p

mysql > create database mauticdb;
mysql > create user 'mauticapp'@'localhost' identified by '<secure password>';
mysql > grant all privileges on mauticdb.* to 'mauticapp'@'localhost';
mysql > flush privileges;
mysql > exit;